
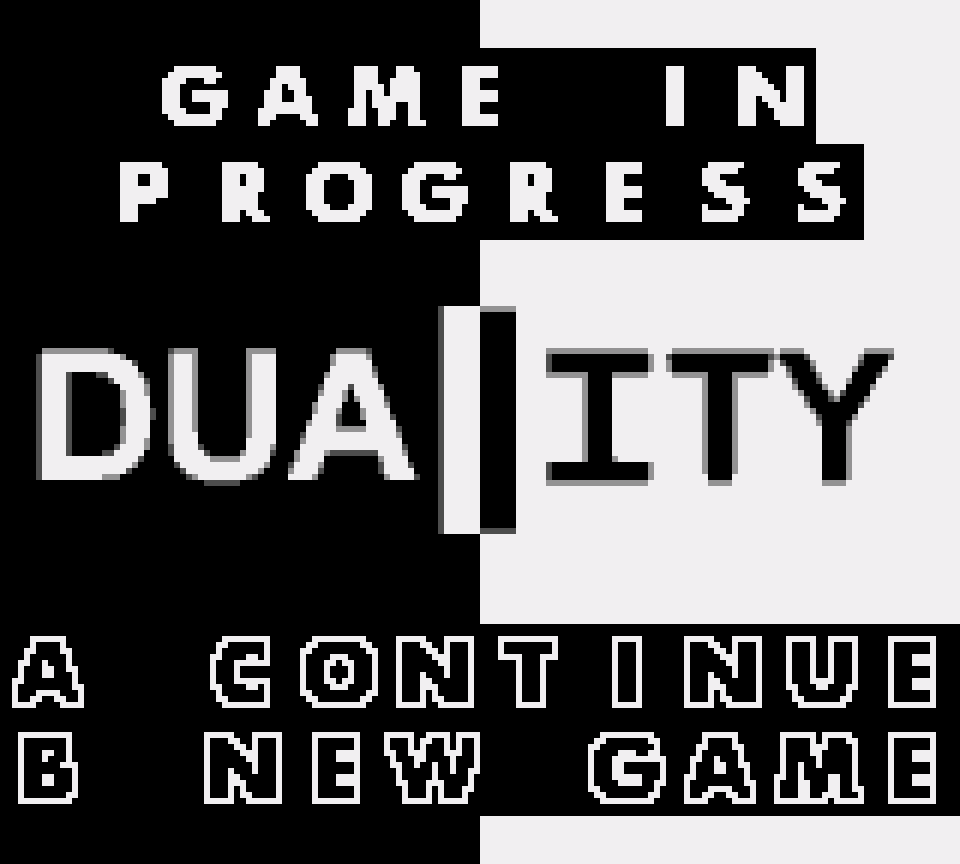
Duality
Game Boy Color game based on a GTA:SA Arcade machine
Project published on August 19, 2025.Last updated on September 01, 2025.
Recent activity in the repo: 
Introduction
I regularly watch the livestreams of fulltime GTA:SA speedrunner Joshimuz.
A while ago he did a PS2 Retro Achievements run.
As part of these he has to get a Top 5 score in the in-game arcade machine Duality in both the black and white highscore table.
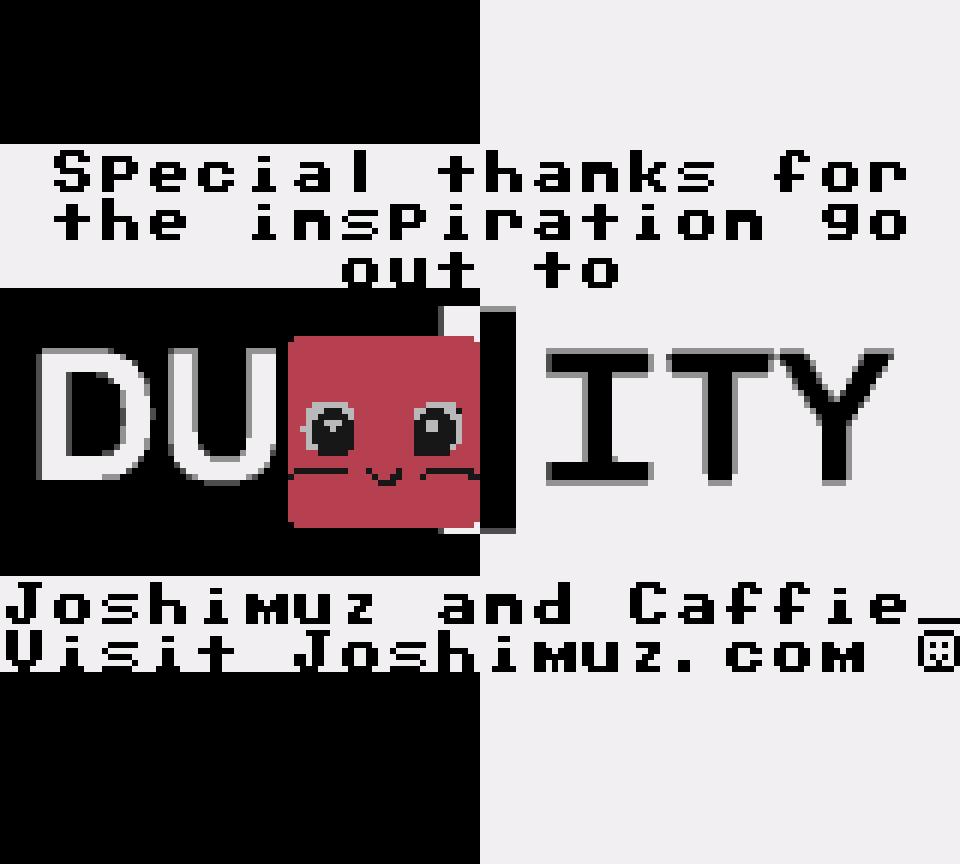
In Part 10 at 04:02:16, when Josh starts playing Duality, chat user Caffie_ mentions how this could be a Game Boy game.
So this inspired me to try to port the game to the Game Boy Color.
Here are the results.
You can either download the ROM or try it out right here, if you have JavaScript enabled, thanks to EmulatorJS.
On PCs use keyboard input with the keys given below. On mobile devices a touch overlay should automatically appear over the emulator.
| Button | Key | Action |
|---|---|---|
| D-Pad Left | Arrow Left | Rotate Left |
| D-Pad Right | Arrow Right | Rotate Right |
| A | S | Accelerate |
| B | A | Shoot |
| Start | Enter | Play / Pause |
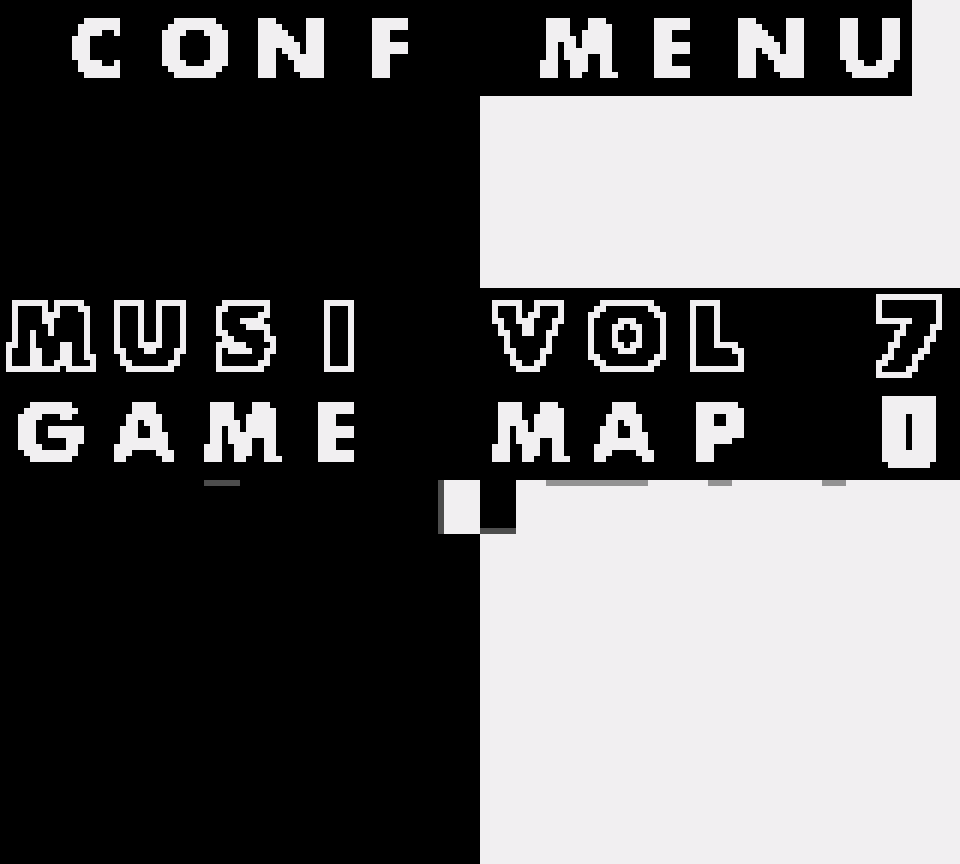
| Select | Space | Config / About |
Although you can use EmulatorJS I recommend a native emulator for your target device if you experience stuttering music or bad performance with the emulator on this page.
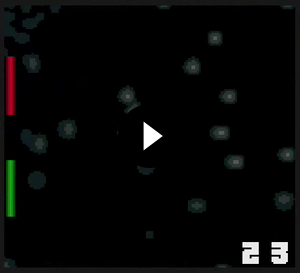
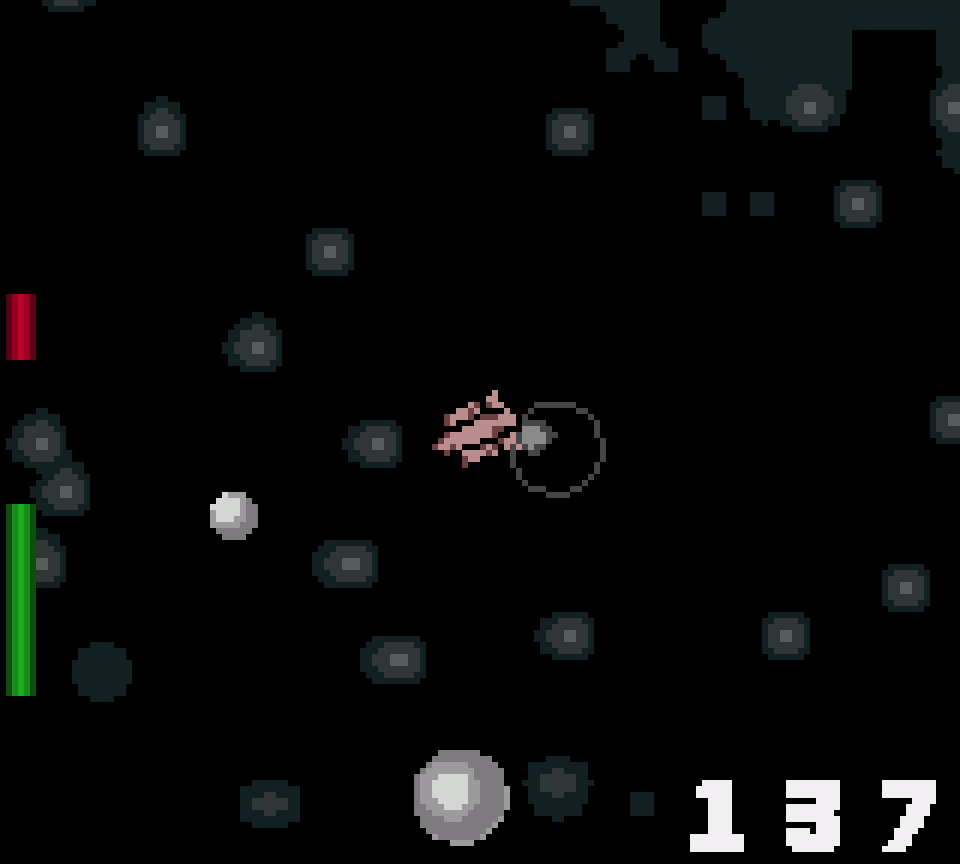
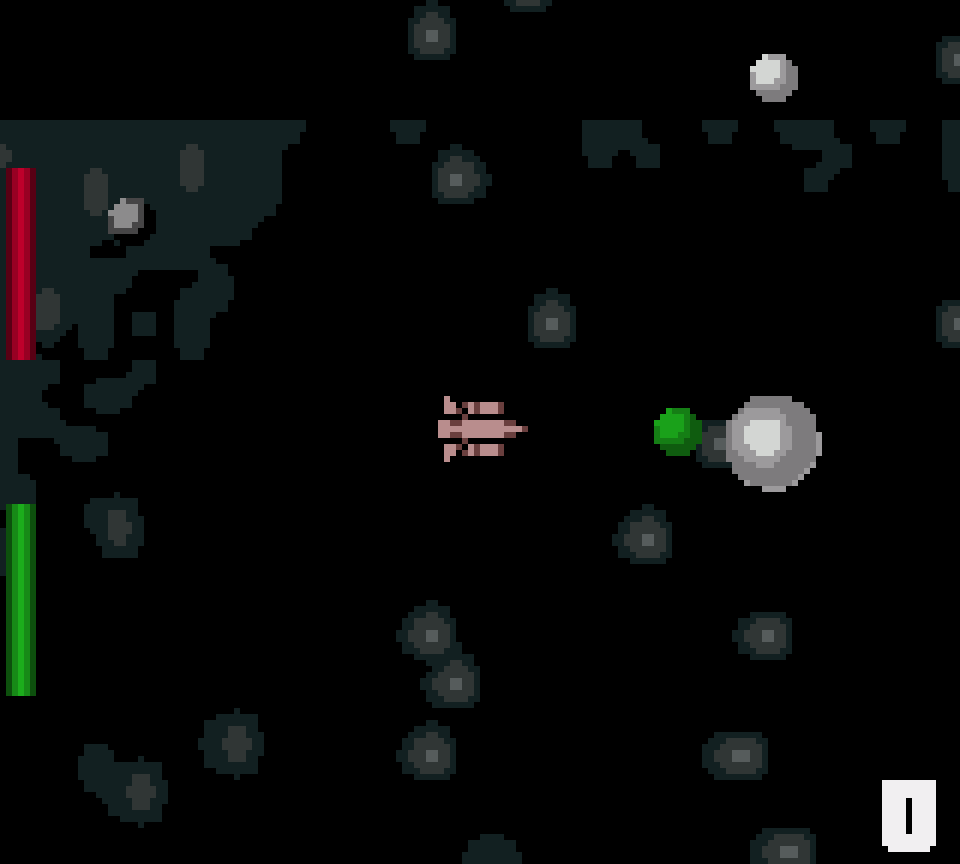
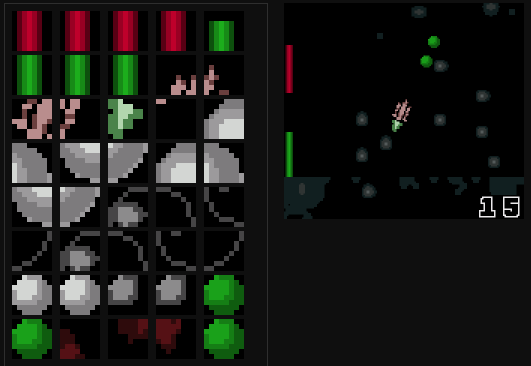
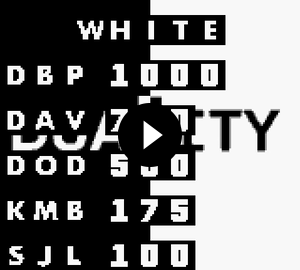
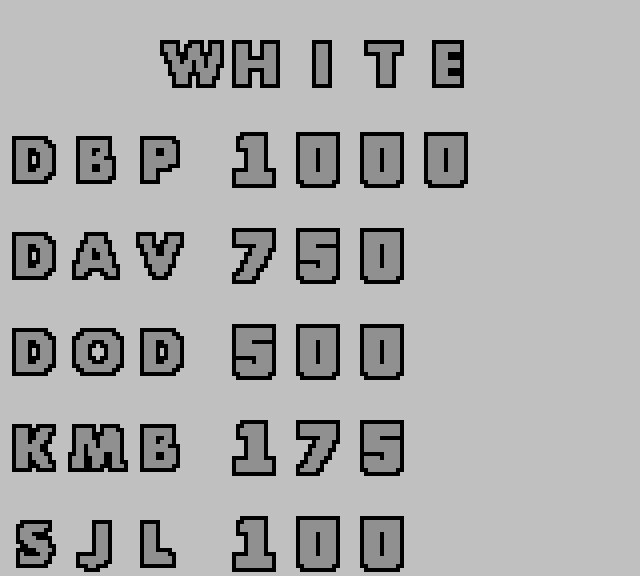
Alternatively here's a short gameplay video and some screenshots.
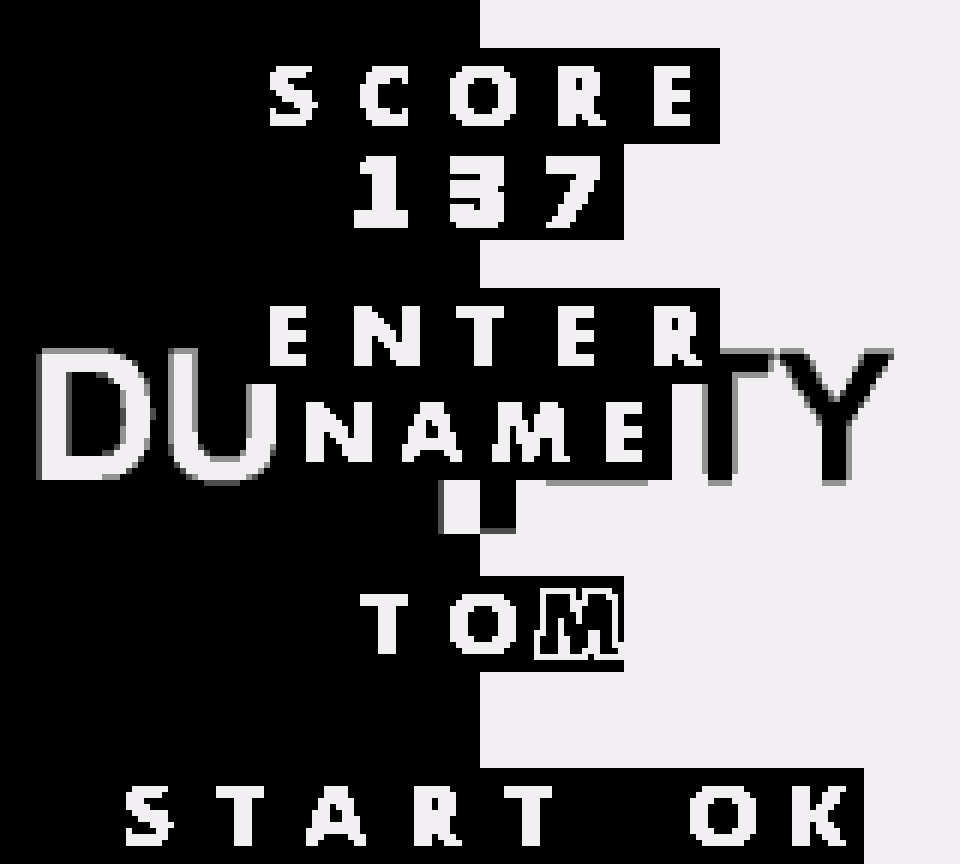
Quick Start Guide
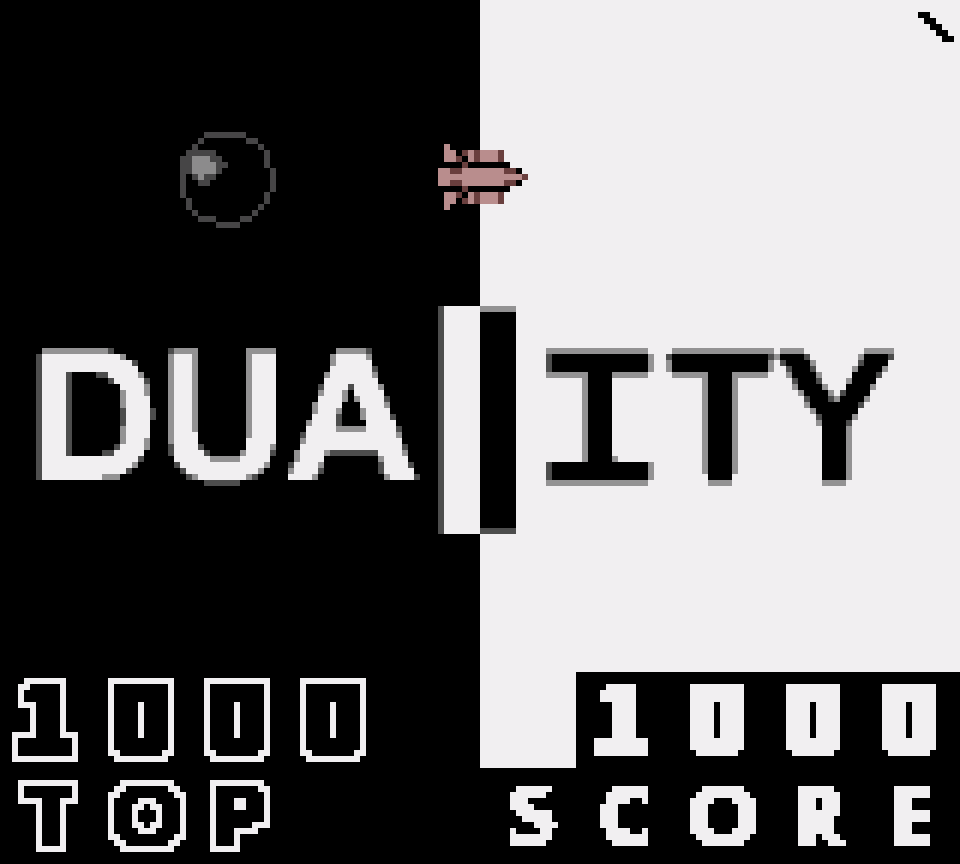
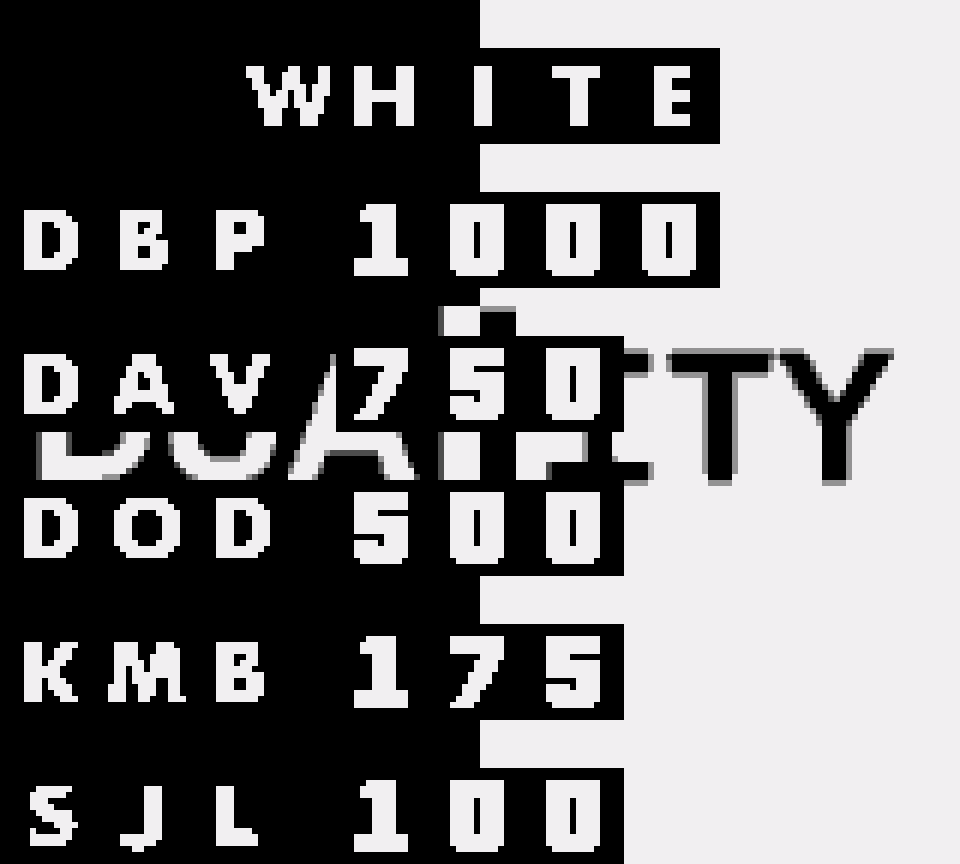
Press Left or Right on the title screen to show either the black or white highscores.
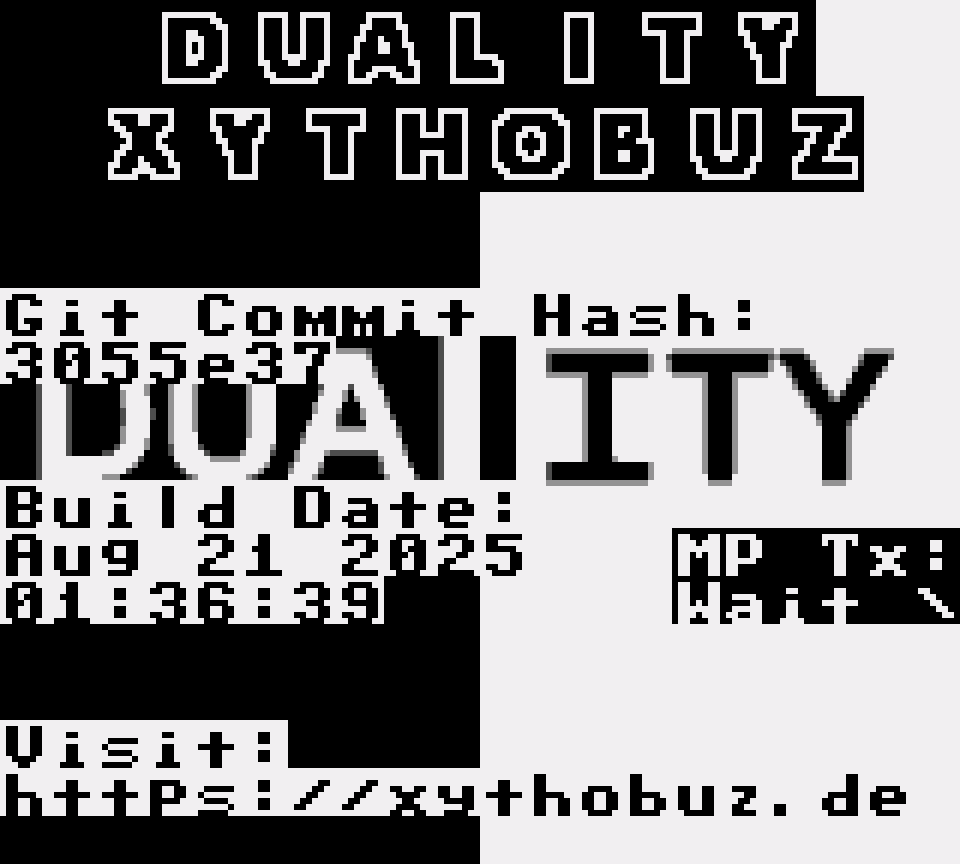
Press Select to show the about screen and build info.
In-game press Start to pause and resume.
While paused press Select to return to the menu.
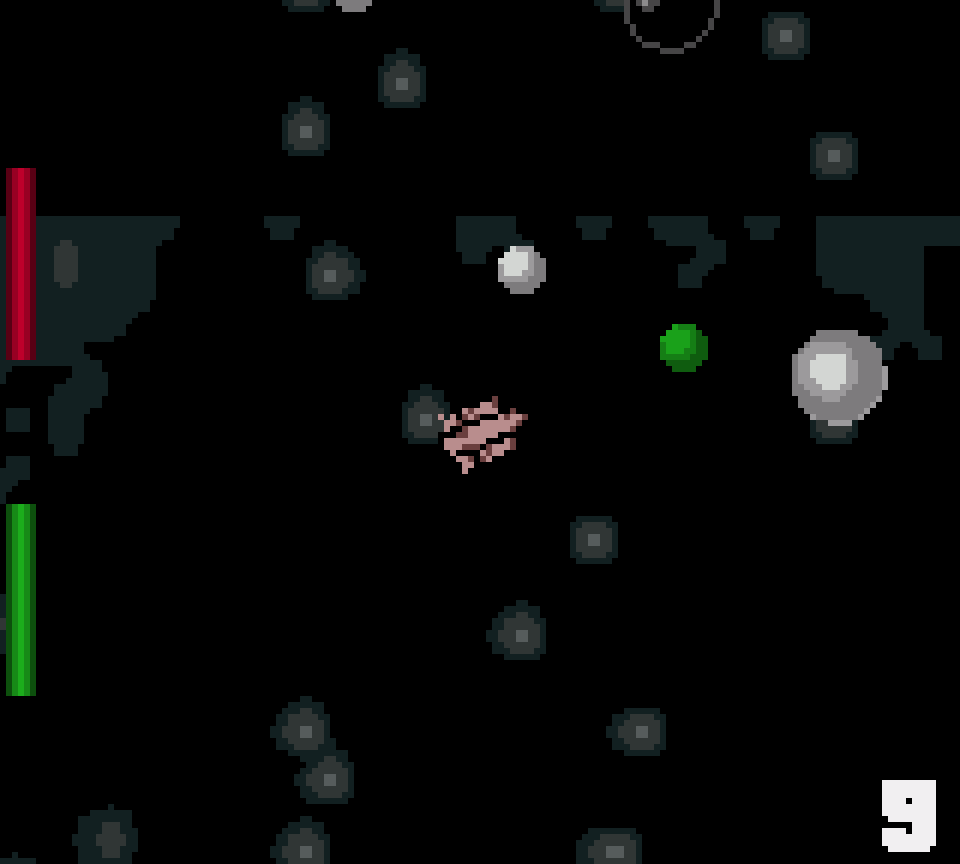
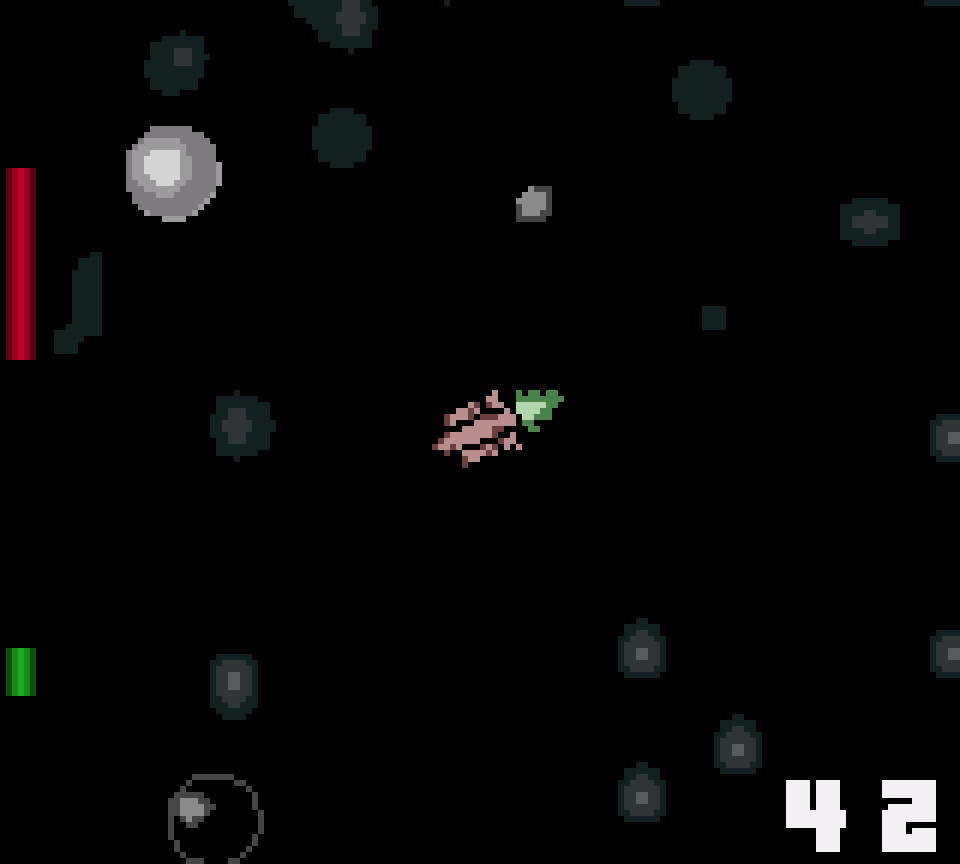
Collect small white spheres to get +5 white score. Collect small black spheres to get +5 black score. The opposite color will reduce your score when collected. Shooting while you have a white score will reduce it by one. Large black holes will attract you and damage your ship when touched. Large white spheres will repel you and replenish your health when touched. Accelerating will reduce your fuel, which will recharge when not accelerating. You can shoot large spheres for +10 points.
For a more detailed description of the original game check out the Duality article on GTA Wiki 😛
Links
The code is of course freely available under the GPL license. Also check out the automatically generated project website on GitHub Pages.
Toolchain
Fortunately the Game Boy is probably one of the retro hardware platforms with the best community-created documentation. The most important piece from this community is Pan Docs, a living document that has been extended and revised over the years that basically is the reference manual for the platform.
I wrote the whole game in C, which is very easy thanks to the GBDK-2020. It uses SDCC as the compiler with some custom tools to link the final ROM file. Additionally it also includes a tool that can convert graphics to the proper hardware sprite tile and map format. The GBDK also comes with good documentation and lots of examples that really make it easy to get started.
Over the course of the project my Makefile grew relatively big and customized.
Of course I've added the usual stuff like dependency file generation and git version information.
I'm also automatically generating the graphics data with the png2asset tool.
To convert sound samples I've modified the cvtsample.py tool from the GBDK examples.
And to pre-calculate some speed vector tables for different angles I wrote my own gen_angles.py script.
To find out how to convert the graphics assets I'm encoding the mode in the filename of the input images.
$(BUILD_DIR)/$(DATA_DIR)/%.c $(BUILD_DIR)/$(DATA_DIR)/%.h: $(DATA_DIR)/%.png Makefile
        @mkdir -p $(@D)
        $(eval SPRFLAG = $(shell echo "$<" | sed -n 's/.*_spr\([0-9]\+\).*/\-sw \1 \-sh \1/p'))
        $(eval FNTFLAG = $(shell echo "$<" | sed -n 's/.*_fnt\([0-9]\+\).*/\-sw \1 \-sh \1/p'))
        $(if $(findstring _map,$<),                                                             \
                @echo "Converting map $<" &&                                                    \
                $(PNGA) $< -o $@ -spr8x8 -map -noflip                                           \
        ,$(if $(findstring _fnt,$<),                                                            \
                @echo "Converting font $<" &&                                                   \
                $(PNGA) $< -o $@ -spr8x8 $(FNTFLAG) -map -noflip                                \
        ,$(if $(findstring _spr,$<),                                                            \
                @echo "Converting 8x8 sprite $<" &&                                             \
                $(PNGA) $< -o $@ -spr8x8 $(SPRFLAG) -noflip                                     \
        ,$(if $(findstring pause,$<),                                                           \
                @echo "Converting 40x16 sprite $<" &&                                           \
                $(PNGA) $< -o $@ -spr8x8 -sw 40 -sh 16 -noflip                                  \
        ,$(if $(findstring _sgb,$<),                                                            \
                @echo "Converting sgb border $<" &&                                             \
                $(PNGA) $< -o $@ -map -bpp 4 -max_palettes 4 -pack_mode sgb -use_map_attributes \
        ,                                                                                       \
                @echo "Converting tile $<" &&                                                   \
                $(PNGA) $< -o $@ -spr8x8                                                        \
        )))))
Link to the complete file "Makefile" (alt 1)
Like with the documentation, the emulation ecosystem for the Game Boy is also very healthy.
- I've mostly been using Gearboy which includes some nice visualization tools for the hardware state.
- To test the Super Game Boy borders I used SameBoy.
- A very nice symbolic C debbuger integration is available in Emulicious.
- GBE+ can also emulate a Game Boy Printer.
- NO$GMB is able to emulate multiple linked Game Boy systems.
- While testing debugging I also played around with BGB for a bit.
- And for one especially hard debugging session I used the reverse-time-step feature of GameRoy with good success (to actually see the faulty jump to the wrong bank after it happened).
The Windows-only emulators all ran fine using Wine.
I described the Emulicious debugger integration to Kate (or VSCode I guess) in more detail in the README.
Software
The game is really made for the Game Boy Color (GBC). On the monochrome Game Boy (DMG) and the Super Game Boy (SGB) it runs at half-speed and the black and white spheres are hard to differentiate. Or, to put it another way, I was not able to optimize the code enough that it run's at the DMG clock speed of ~1MHz. So I had to cheat by putting the GBC CPU into a double-clock mode.
    // "cheat" and enable double-speed CPU mode on GBC
    if (_cpu == CGB_TYPE) {
        cpu_fast();
    }
Link to the complete file "main.c" (alt 1)
To get some randomness into the gameplay I'm initially showing a splash screen after reset, where the user has to press Start.
The timing of this button-press is used to initialize a random number generator that's later used to determine spawning positions of objects in the world map.
    splash();

#ifdef CONSTANT_SEED
    uint16_t seed = CONSTANT_SEED;
#else
    uint16_t seed = DIV_REG;
    waitpadup();
    seed |= ((uint16_t)DIV_REG) << 8;
#endif

    // store in an SRAM variable, so the
    // value goes over the cartridge bus.
    // gives gb-interceptor a chance to see it.
    prng_seed = seed;
    initarand(prng_seed);
Link to the complete file "main.c" (alt 1)
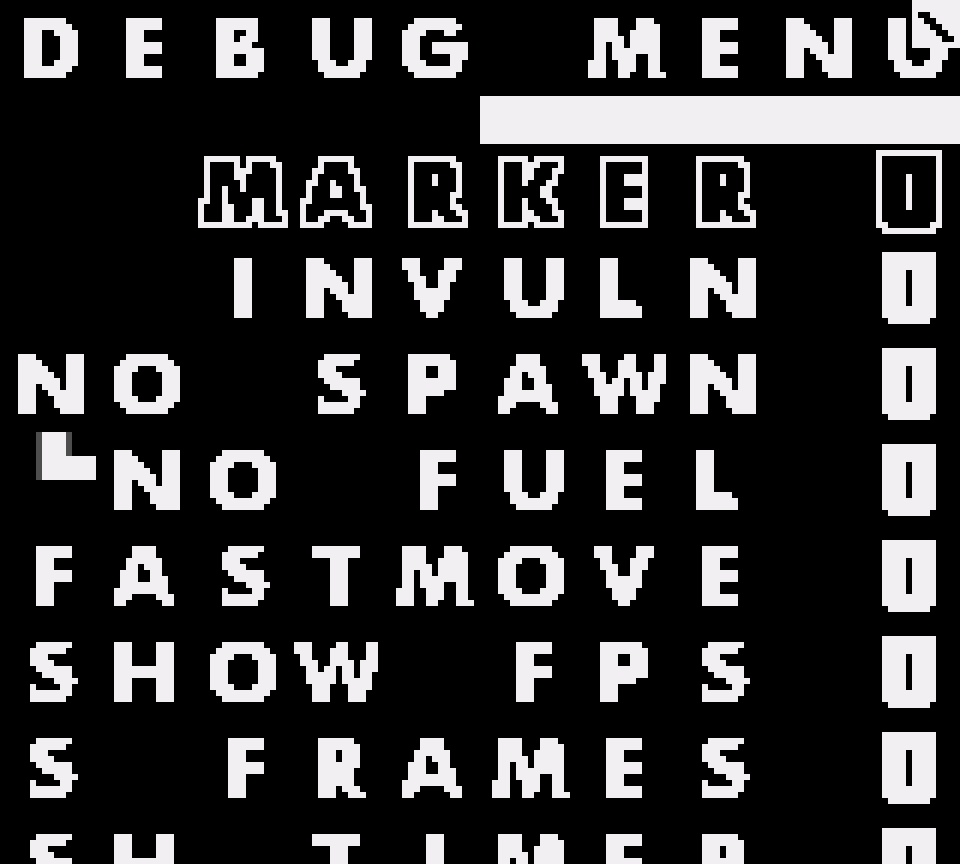
The splash screen in main.c also handles the configuration and debug menus (try the Konami code).
The main game loop in game.c is pretty straight-forward, like with most game engines.
It basically does the following things:
- read key inputs from user
- modify player and world state (according to input and time)
- draw the output graphics
The world state is kept track of in obj.c, where each shot and colored sphere is represented as an entry in an object list.
Background music is played automatically on the pulse channels (1 and 2), as well as the noise channel (4). Only the sample channel (3) is used for sound effects like shots or explosions. Both of these are handled by interrupts, so they should never stutter or crackle (instead gameplay slows down). For timekeeping I'm also configuring the internal timer and handle all of these tasks in the same ISR.
static void timer_isr(void) NONBANKED {
    sample_isr();
    snd_play();
    count++;
}
Link to the complete file "timer.c" (alt 1)
One pattern I've used repeatedly is storing (const) lists of "things" in ROM to be able to use them easily in other places.
This is used for sprites, background maps, sound samples and music.
For example, this is the start of the list of sprite graphics.
struct sprites metasprites[SPRITE_COUNT] = {
    { // SPR_SHIP
        .ms = rockshp_spr24_metasprites,
        .ms_n = ARR_LEN(rockshp_spr24_metasprites),
        .ti = rockshp_spr24_tiles,
        .pa = rockshp_spr24_palettes,
        .pa_n = rockshp_spr24_PALETTE_COUNT,
        .pa_i = OAMF_CGB_PAL0,
        .cnt = rockshp_spr24_TILE_COUNT,
        .off = TILE_NUM_START,
        .bank = BANK(rockshp_spr24),
    },
    { // SPR_LIGHT
        .ms = light_metasprites,
        .ms_n = ARR_LEN(light_metasprites),
        .ti = light_tiles,
        .pa = light_palettes,
        .pa_n = light_PALETTE_COUNT,
        .pa_i = OAMF_CGB_PAL2,
        .cnt = light_TILE_COUNT,
        .off = TILE_NUM_START,
        .bank = BANK(light),
    },
    { // SPR_DARK
Link to the complete file "sprite_data.c" (alt 1)
By then calling the sprite functions the correct data is automatically loaded into VRAM and used accordingly.
The sprite and map lists are not const because the offsets are calculated dynamically when loaded.
The music and sample lists are both const though.
void spr_init(void);
void spr_init_pal(void);
void spr_draw(enum SPRITES sprite, enum SPRITE_FLIP flip, int8_t x_off, int8_t y_off, uint8_t frame, uint8_t *hiwater);
void spr_ship(enum SPRITE_ROT rot, uint8_t moving, uint8_t *hiwater);
Link to the complete file "sprites.h" (alt 1)
It's not possible to rotate sprites by arbitrary angles, only the X and Y axis can be flipped individually. So for each desired rotation a sprite has to be prepared manually.
I decided to split the circle into 16 different angles, or 22.5 degree steps. When taking advantage of the tile flipping we can get away with five different sprite rotations, from 0 degrees to 90 degrees.
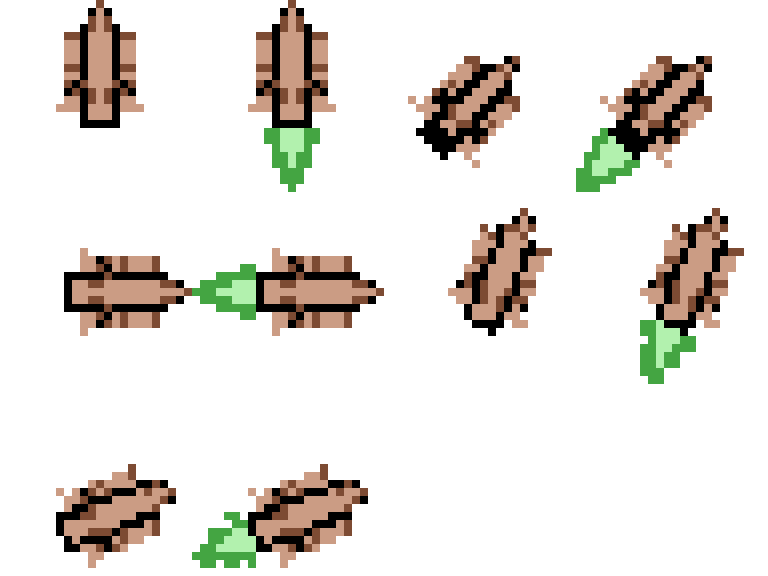
To get the proper movement and shot velocity vectors for the current angle I'm also pre-calculating these tables.
const int8_t table_speed_move[table_speed_move_SIZE] = {
    0, 23, // 0.0
    9, 21, // 22.5
    16, 16, // 45.0
    21, 9, // 67.5
    23, 0, // 90.0
    21, -9, // 112.5
    16, -16, // 135.0
    9, -21, // 157.5
    0, -23, // 180.0
    -9, -21, // 202.5
    -16, -16, // 225.0
    -21, -9, // 247.5
    -23, 0, // 270.0
    -21, 9, // 292.5
    -16, 16, // 315.0
    -9, 21, // 337.5
};
Graphics
To easily visualize the data in VRAM here are some screenshots from Gearboy.
There's not enough space to fit all graphics data at once, so I'm loading different subsets in the menu and in-game.
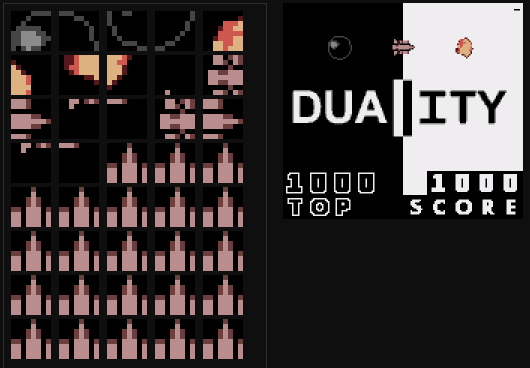
- The first image shows the sprite objects in OAM. These are instances of tiles from the tile data.
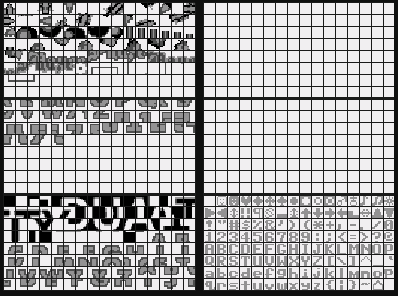
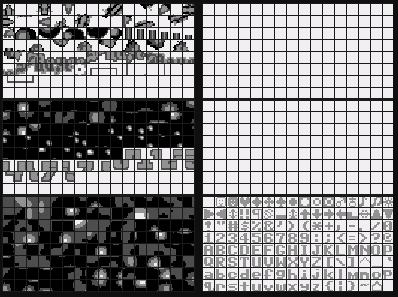
- Tile data is shown in the upper left part of the second image. The middle and lower left parts of the second image contain the tile data for the background maps and window. The right half of the second image shows a second bank only available on GBC, which I use for a smaller font.
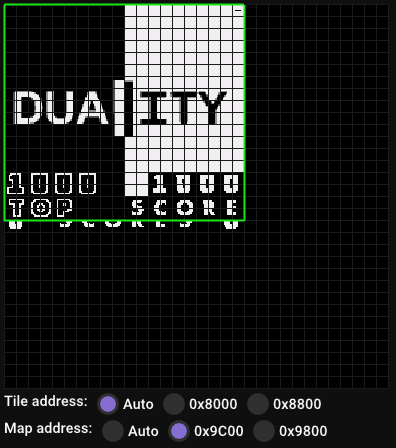
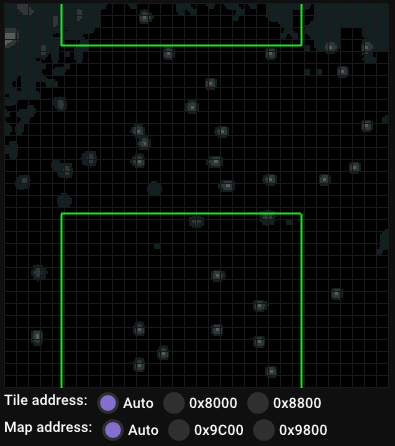
- The third image shows the background map, a large map of tiles that can be scrolled easily.
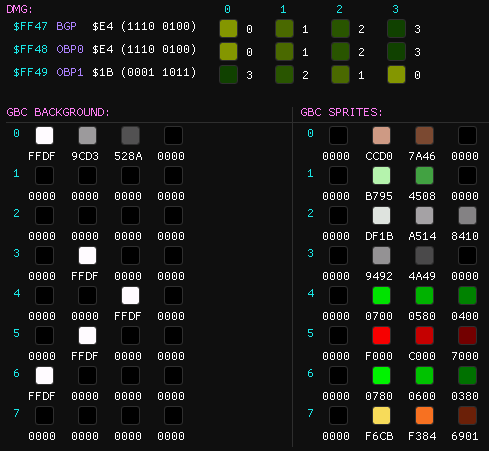
- The fourth image shows the palettes to colorize the tiles on GBC hardware.
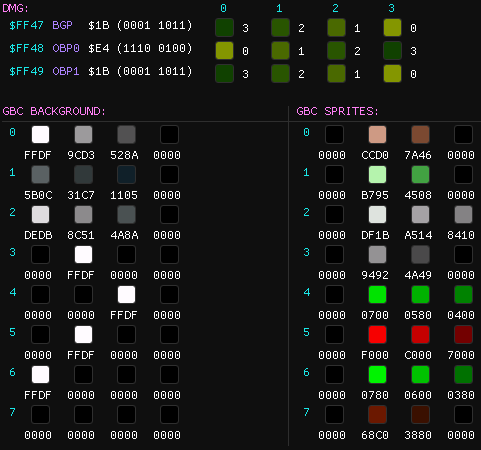
You can only store a maximum of 40 tile instances in OAM at once, but there are more complicated rules on when they appear. To colorize tiles the GBC adds a palette index to the attributes.
The background map works similar to the OAM in that it indexes the background tile map, but the positions are fixed and the GBC has attributes for the map that don't exist on DMG.
Sound
The background music is simply stored as long lists of notes. Here are some example excerpts from the score-screen music.
#include <assert.h>

#include "banks.h"
#include "sound.h"
#include "sound_over.h"

BANKREF(sound_over)

static const enum notes over_notes[] = {
    // repeat 1

    Ab4,  C5, Ab4,  F4, Ab4, Ab4, Ab4,  C5,
    Ab4,  F4, Ab4, Bb4,  C5, Bb4, Ab4,  F4,

     A4,  C5,  A4,  F4,  A4,  A4,  A4,  C5,
     A4,  F4,  A4, Bb4,  C5, Bb4,  A4,  F4,


// ...

    END
};

#define ADD_LOOP \
    Ab2, SIL, Ab2, SIL, Ab2, SIL, Ab2, SIL, \
    Ab2, SIL, Ab2, SIL, Ab2, SIL, Ab2, SIL

#define ADD_LOOP_2 \
     A2, SIL,  A2, SIL,  A2, SIL,  A2, SIL, \
     A2, SIL,  A2, SIL,  A2, SIL,  A2, SIL

#define ADD_LOOP_3 \
     E2, SIL,  E2, SIL,  E2, SIL,  E2, SIL, \
     E2, SIL,  E2, SIL,  E2, SIL,  E2, SIL

static const enum notes over_notes2[] = {
    // repeat 1

    ADD_LOOP, ADD_LOOP_2,
    ADD_LOOP, ADD_LOOP_3,
    ADD_LOOP, ADD_LOOP_2,

    Db3, Db3, Db3, Db3, Db3, Db3, Db3, Db3,
    SIL, SIL, SIL, SIL, SIL, SIL, SIL, SIL,
    SIL, SIL, SIL, SIL, SIL, SIL, SIL, SIL,
    SIL, SIL, SIL, SIL, SIL, SIL, SIL, SIL,


// ...

    END
};

#define DRUM_LOOP \
    dKi, dSI, dSI, dSI, dSI, dSI, dKi, dSI, \
    dSn, dSI, dSI, dSI, dKi, dSI, dSI, dSI  \

static const enum drums over_drums[] = {
    DRUM_LOOP,
    DRUM_LOOP,
    DRUM_LOOP,
    DRUM_LOOP,
    DRUM_LOOP,
    DRUM_LOOP,
    DRUM_LOOP,
    DRUM_LOOP,
    DRUM_LOOP,
    DRUM_LOOP,


// ...

    dEND
};

static_assert(sizeof(over_notes)  == sizeof(over_notes2), "music loops need to be same length");
static_assert(sizeof(over_notes2) == sizeof(over_drums),  "music loops need to be same length");
static_assert(sizeof(over_notes)  == sizeof(over_drums),  "music loops need to be same length");

const struct music music_over = {
    .notes = over_notes,
    .notes2 = over_notes2,
    .drums = over_drums,
    .duration = 120,
    .repeat = MUSIC_NO_REPEAT,
};
Link to the complete file "sound_over.c" (alt 1)
over_notes and over_notes2 are the frequencies for the two pulse channels.
over_drums has the IDs of different pre-defined settings for the noise channel.
The snd_play() function in sound.c is then walking through this list after the note duration has elapsed, filling the sound hardware registers as needed.
BANKREF(sound)

const uint16_t frequencies[SILENCE] = {
      44,  156,  262,  363,  457,  547,  631,  710,  786,  854,  923,  986, //  0 .. 11
    1046, 1102, 1155, 1205, 1253, 1297, 1339, 1379, 1417, 1452, 1486, 1517, // 12 .. 23
    1546, 1575, 1602, 1627, 1650, 1673, 1694, 1714, 1732, 1750, 1767, 1783, // 24 .. 35
    1798, 1812, 1825, 1837, 1849, 1860, 1871, 1881, 1890, 1899, 1907, 1915, // 36 .. 47
    1923, 1930, 1936, 1943, 1949, 1954, 1959, 1964, 1969, 1974, 1978, 1982, // 48 .. 59
    1985, 1988, 1992, 1995, 1998, 2001, 2004, 2006, 2009, 2011, 2013, 2015  // 60 .. 71
};

static volatile struct music const * music = NULL;
static volatile uint8_t bank;
static volatile uint8_t duration;
static volatile uint16_t off = 0;
static volatile uint16_t last_t = 0;

struct snds {
    uint8_t bank;
    struct music const * snd;
};

static const struct snds snds[SND_COUNT] = {
    { .bank = BANK(sound_menu), .snd = &music_menu }, // SND_MENU
    { .bank = BANK(sound_game), .snd = &music_game }, // SND_GAME
    { .bank = BANK(sound_over), .snd = &music_over }, // SND_GAMEOVER
};

#define CALL_FREQ_HZ 256

static void play_note(enum notes note) NONBANKED {
    if (note < SILENCE) {
        uint16_t freq;
        START_ROM_BANK(BANK(sound)) {
            freq = frequencies[note];
        } END_ROM_BANK

        NR11_REG = 0x80 | duration; // 50% duty, higher value is shorter time (up to 0x3F)
        NR12_REG = (conf_get()->music_vol << 4) | 0x00; // given volume, no change
        NR13_REG = freq & 0xFF; // given frequency
        NR14_REG = 0x80 | 0x40 | ((freq >> 8) & 0x07); // trigger, enable length, upper freq bits
    }
}

static void play_note2(enum notes note) NONBANKED {
    if (note < SILENCE) {
        uint16_t freq;
        START_ROM_BANK(BANK(sound)) {
            freq = frequencies[note];
        } END_ROM_BANK

        NR21_REG = 0x80 | duration; // 50% duty, higher value is shorter time (up to 0x3F)
        NR22_REG = (conf_get()->music_vol << 4) | 0x00; // given volume, no change
        NR23_REG = freq & 0xFF; // given frequency
        NR24_REG = 0x80 | 0x40 | ((freq >> 8) & 0x07); // trigger, enable length, upper freq bits
    }
}

static void play_drum(enum drums drum) NONBANKED {
    switch (drum) {
        case dKick:
            NR41_REG = 0x2F; // length timer, higher value is shorter time (up to 0x3F)
            NR42_REG = (conf_get()->music_vol << 4) | 0x00; // initially full volume, no volume changes over time
            NR43_REG = 0x11; // frequency distribution
            NR44_REG = 0xC0; // trigger and enable length
            break;

        case dSnare:
            NR41_REG = 0x10; // length timer, higher value is shorter time (up to 0x3F)
            NR42_REG = (conf_get()->music_vol << 4) | 0x02; // initially full volume, then fade sound out
            NR43_REG = 0x46; // frequency distribution
            NR44_REG = 0xC0; // trigger and enable length
            break;

        default:
            break;
    }
}

void snd_init(void) BANKED {
    NR52_REG = 0x80; // sound on
    NR51_REG = 0xFF; // all channels on left and right

#ifdef DEBUG
    NR50_REG = 0x33; // left and right on half volume
#else
    NR50_REG = 0x77; // left and right on full volume
#endif
}

void snd_music_off(void) BANKED {
    CRITICAL {
        music = NULL;
    }
}

void snd_note_off(void) BANKED {
    play_note(SILENCE);
    play_note2(SILENCE);
}

static uint16_t snd_duration(enum SOUNDS snd) NONBANKED {
    uint16_t r;
    START_ROM_BANK(snds[snd].bank) {
        r = snds[snd].snd->duration;
    } END_ROM_BANK
    return r;
}

void snd_music(enum SOUNDS snd) BANKED {
    if (snd >= SND_COUNT) {
        return;
    }

    CRITICAL {
        music = snds[snd].snd;
        bank = snds[snd].bank;
        duration = 0x3F - MIN((snd_duration(snd) >> 2) + 1, 0x3F);
        off = 0;
        last_t = timer_get();
    }
}

void snd_play(void) NONBANKED {
    if (!music) {
        return;
    }

    START_ROM_BANK(bank) {
        uint16_t diff = timer_get() - last_t;
        if (diff >= music->duration) {
            if (music->notes) {
                if (music->notes[off] != END) {
                    play_note(music->notes[off]);
                } else {
                    if (music->repeat != MUSIC_NO_REPEAT) {
                        off = music->repeat;
                        snd_play();
                        goto end;
                    } else {
                        music = NULL;
                        goto end;
                    }
                }
            }

            if (music && music->notes2) {
                if (music->notes2[off] != END) {
                    play_note2(music->notes2[off]);
                } else {
                    if (music->repeat != MUSIC_NO_REPEAT) {
                        off = music->repeat;
                        snd_play();
                        goto end;
                    } else {
                        music = NULL;
                        goto end;
                    }
                }
            }

            if (music && music->drums) {
                if (music->drums[off] != dEND) {
                    play_drum(music->drums[off]);
                } else {
                    if (music->repeat != MUSIC_NO_REPEAT) {
                        off = music->repeat;
                        snd_play();
                        goto end;
                    } else {
                        music = NULL;
                        goto end;
                    }
                }
            }

            off++;
            last_t += music->duration;
        }

end:
    } END_ROM_BANK
}
Link to the complete file "sound.c" (alt 1)
For the sound effect sample player I've transcribed the assembly ISR from the GBDK examples to C, which was a fun little exercise in SM83 assembly.
#if 1

// TODO C version has a slight 'beep' always? and much worse at lower volumes?

void sample_isr(void) NONBANKED {
    if (play_length == 0) {
        return;
    }

    NR51_REG = 0xBB; // turn CH3 off in left and right pan
    NR30_REG = 0x00; // turn DAC off

    START_ROM_BANK(play_bank) {
        // load waveforms
        for (uint8_t i = 0; i < 16; i++) {
            _AUD3WAVERAM[i] = *(play_sample++);
        }
    } END_ROM_BANK

    NR30_REG = 0x80; // turn DAC on
    NR31_REG = 0xFE; // length of wave, 2nd shortest
    NR32_REG = (4 - /*conf_get()->sfx_vol*/0x03) << 5;
    NR33_REG = 0x00; // low freq bits are zero
    NR34_REG = 0xC7; // start, no loop, high freq bits are 111
    NR51_REG = 0xFF; // turn all channels on

    play_length--;
}

#else

// TODO ASM version has less beep at full volume, but also beeping at lower volumes?

void sample_isr(void) NONBANKED NAKED {
    __asm
        ld hl, #_play_length    ; something left to play?
        ld a, (hl+)
        or (hl)
        ret z

        ld hl, #_play_sample
        ld a, (hl+)
        ld h, (hl)
        ld l, a                 ; HL = current position inside the sample

                                ; load new waveform
        ld a, (#__current_bank) ; save bank and switch
        ld e, a
        ld a, (#_play_bank)
        ld (_rROMB0), a

        ldh a, (_NR51_REG)
        ld c, a
        and #0b10111011
        ldh (_NR51_REG), a

        xor a
        ldh (_NR30_REG), a

        .irp ofs,0,1,2,3,4,5,6,7,8,9,10,11,12,13,14,15
            ld a, (hl+)
            ldh (__AUD3WAVERAM+ofs), a
        .endm

        ld a, #0x80
        ldh (_NR30_REG), a
        ld a, #0xFE             ; length of wave
        ldh (_NR31_REG), a
        ld a, #0x20             ; volume
        ldh (_NR32_REG), a
        xor a                   ; low freq bits are zero
        ldh (_NR33_REG), a
        ld a, #0xC7             ; start; no loop; high freq bits are 111
        ldh (_NR34_REG), a

        ld a, c
        ldh (_NR51_REG), a

        ld a, e                 ; restore bank
        ld (_rROMB0), a

        ld a, l                 ; save current position
        ld (#_play_sample), a
        ld a, h
        ld (#_play_sample+1), a

        ld hl, #_play_length    ; decrement length variable
        ld a, (hl)
        sub #1
        ld (hl+), a
        ld a, (hl)
        sbc #0
        ld (hl), a
        ret
    __endasm;
}
#endif
Link to the complete file "sample.c" (alt 1)
Banking
Probably the most important topic in Game Boy software development is memory banking. Take a look at the memory map of the system.
| Start | End | Description |
|---|---|---|
| 0x0000 | 0x3FFF | 16 KiB ROM bank 00 |
| 0x4000 | 0x7FFF | 16 KiB ROM Bank 01 – NN |
| 0x8000 | 0x9FFF | 8 KiB Video RAM (VRAM) |
| 0xA000 | 0xBFFF | 8 KiB External RAM (SRAM) |
| 0xC000 | 0xCFFF | 4 KiB Work RAM (WRAM) |
| 0xD000 | 0xDFFF | 4 KiB Work RAM (WRAM) |
| 0xE000 | 0xFDFF | Echo RAM (mirrors WRAM) |
| 0xFE00 | 0xFE9F | Object attribute memory (OAM) |
| 0xFEA0 | 0xFEFF | Not Usable |
| 0xFF00 | 0xFF7F | I/O Registers |
| 0xFF80 | 0xFFFE | High RAM (HRAM) |
| 0xFFFF | 0xFFFF | Interrupt Enable register (IE) |
Only the 32KiB ROM bank areas at 0x0000 - 0x7FFF and the 8KiB RAM at 0xA000 - 0xBFFF are coming from the cartridge.
The cartridge RAM is usually used to store persistent savegames and configs on a battery backed SRAM.
The code and data live in the first 32KiB.
Of course for many games these 32KiB are not enough, so they use some special hardware in the cartridge to map different memory chips to the same address range, depending on a configuration register. This is accomplished by Nintendos Memory Bank Controllers, most commonly (and for this game) the MBC5.
Each bank has a size of 16KiB, with the first bank (0) always mapped to the first 16KiB of the address space. The next half of the ROM area is for the switchable bank, which can be selected by writing to the MBC-internal registers.
Fortunately GBDK already contains a bunch of helper functions that make this all a bit easier. For the ROM banks we have to differentiate the following cases.
- const data in a bank
- functions in bank 0 (non-banked)
- non-static functions in a bank
- static functions (in a bank)
Also note that with the GBDK and SDCC every compilation unit (so each .c file) can only be part of one bank.
Which unit goes into which bank can be decided automatically (autobanking).
First enable autobanking by passing the proper compiler flag -Wm-yoA.
Now, at the start of each .c and .h files, declare a reference to the bank of this compilation unit.
/* in some_name.c */
BANKREF(some_name)

/* in some_name.h */
BANKREF_EXTERN(some_name)
Of course each unit needs a unique some_name (does not need to be the filename).
Now you can declare your non-static functions with an attribute to place them in the correct bank.
void foo(void) BANKED;
void bar(void) NONBANKED;
When you call a BANKED function a trampoline in bank 0 automatically takes care of proper bank switching for you.
Only when calling static functions not marked as BANKED (case 4 from above) you need to make sure you're either already in the correct bank (by coming from a BANKED function from the same compilation unit), or to switch banks manually (when coming from a NONBANKED function).
To easily bank-switch I made some small helper macros.
#define START_ROM_BANK_2(x) __xyz_previous__bank = CURRENT_BANK; SWITCH_ROM(x); do
#define START_ROM_BANK(x) uint8_t START_ROM_BANK_2(x)
#define END_ROM_BANK while (0); SWITCH_ROM(__xyz_previous__bank);
Link to the complete file "banks.h" (alt 1)
const data has the same restrictions, so when you need to read const data from one bank in a function from another compilation unit you may need to add a small NONBANKED helper function.
static uint8_t is_conf_hw(uint8_t i) NONBANKED {
    uint8_t r;
    START_ROM_BANK(BANK(main)) {
        r = (conf_entries[i].type == HW_ALL) || (conf_entries[i].type == get_hw());
    } END_ROM_BANK
    return r;
}
Link to the complete file "window.c" (alt 1)
Of course you can never directly switch banks inside a function that is not NONBANKED as this would replace the currently executed opcodes.
Initially I started out with lots of functions marked as NONBANKED, but this turned out to be unnecessary.
By properly modularizing your code and liberally using BANKED you can get the compiler to do most of the work for you.
It's also relatively easy to spot banking errors.
Most of the time the VRAM will quickly fill with some regular pattern, like horizontal or vertical lines.
Or a debugger shows you suddenly in the middle of nowhere.
But I also had some devious cases, where the control flow jumped into some legitimate code that caused strange effects (wrong sound effects, no objects appearing, but the game still ran).
These took me a while to figure out, until I noticed a return that skipped the final END_ROM_BANK of a function, thereby forgetting to switch-back the bank.
RAM banks, in comparison, can be handled more easily. I'm simply enabling and setting RAM bank 0 at the beginning, before reading the config from there, and always keep it enabled while the game is running.
void conf_init(void) BANKED {
    ENABLE_RAM;
    SWITCH_RAM(0);

    if (calc_crc() != mem.crc) {
        mem.config.debug_flags = 0;
        //mem.config.sfx_vol = 0x03;
        mem.config.music_vol = 0x07;

        if (_cpu == CGB_TYPE) {
            mem.config.game_bg = 0;
        } else {
            mem.config.game_bg = 1;
        }

        mem.config.dmg_bg_inv = 1;

        score_reset();

        mem.state.in_progress = 0;
    }
}
Link to the complete file "config.ba0.c" (alt 1)
Similar to the png2asset calls the RAM bank of a compilation unit is specified in the filename (foo.baN.c where N is the RAM bank number).
$(BUILD_DIR)/%.o: %.c $(ASSETS) Makefile
        @mkdir -p $(@D)
        @echo Compiling Code $<
        $(eval BAFLAG = $(shell echo "$<" | sed -n 's/.*\.ba\([0-9]\+\).*/\-Wf-ba\1/p'))
        @$(LCC) $(LCCFLAGS) $(BAFLAG) -c -o $@ $<
Link to the complete file "Makefile" (alt 1)
This is what the memory usage for my game looks like at the moment.
Bank         Range                Size     Used  Used%     Free  Free%
--------     ----------------  -------  -------  -----  -------  -----
ROM_0        0x0000 -> 0x3FFF    16384    10466    64%     5918    36%
ROM_1        0x4000 -> 0x7FFF    16384    16383   100%        1     0%
ROM_2        0x4000 -> 0x7FFF    16384    16377   100%        7     0%
ROM_3        0x4000 -> 0x7FFF    16384    16383   100%        1     0%
ROM_4        0x4000 -> 0x7FFF    16384     5903    36%    10481    64%
SRAM_0       0xA000 -> 0xBFFF     8192      427     5%     7765    95%
WRAM_LO      0xC000 -> 0xCFFF     4096     1650    40%     2446    60%
So I'm using five ROM banks in total for code and data (which has to be rounded up to eight banks, or 128KiB, as cartridges only can speficy ROM bank counts that are a power of two). And a single SRAM bank (8KiB) for persistent highscores, configs and a savegame, which is the smallest number of SRAM banks possible. Take care not to fill ROM bank 0 too close to the limit, as the ROM header is not always properly taken into account in all tools.
Game Boy Printer
The GBDK already comes with a Game Boy Printer example which I cleaned up and modified. Instead of reading a converted image I'm directly getting the tile data from VRAM to print either the window or background map. The data is read in blocks of two tile rows which are blacked out after transmission as a progress indicator.
enum PRN_STATUS gbprinter_screenshot(uint8_t win, uint8_t palette) BANKED {
static uint8_t tile_buff[2 * DEVICE_SCREEN_WIDTH * 16];
static struct prn_config params;
enum PRN_STATUS r = PRN_STATUS_OK;
printer_send_command(PRN_CMD_INIT, NULL, 0);
for (int y = 0; y < DEVICE_SCREEN_HEIGHT; y += 2) {
for (int y2 = 0; y2 < 2; y2++) {
for (int x = 0; x < DEVICE_SCREEN_WIDTH; x++) {
uint8_t tile = win ? get_win_tile_xy(x, y + y2) : get_bkg_tile_xy(x, y + y2);
win ? get_win_data(tile, 1, tile_buff + ((x + (y2 * DEVICE_SCREEN_WIDTH)) * 16))
: get_bkg_data(tile, 1, tile_buff + ((x + (y2 * DEVICE_SCREEN_WIDTH)) * 16));
}
// black out rows we have sent, to indicate transfer progress
win ? fill_win_rect(0, y + y2, DEVICE_SCREEN_WIDTH, 1, 0)
: fill_bkg_rect(0, y + y2, DEVICE_SCREEN_WIDTH, 1, 0);
}
if (win) {
if (y == 0) {
win_str_helper("gb printer", 0);
} else if (y == 2) {
win_str_helper("transmit", 2);
} else if (y == 8) {
win_str_helper("in", 8);
} else if (y == 10) {
win_str_helper("progress", 10);
} else if (y == 16) {
win_str_helper("printing", 16);
}
}
r = printer_send_command(PRN_CMD_DATA, tile_buff, sizeof(tile_buff));
if ((r & ~PRN_STATUS_UNTRAN) != PRN_STATUS_OK) {
r |= PRN_STATUS_AT_DATA;
goto end;
}
if (printer_check_cancel()) {
printer_send_command(PRN_CMD_BREAK, NULL, 0);
r |= PRN_STATUS_CANCELLED;
goto end;
}
}
printer_send_command(PRN_CMD_DATA, NULL, 0);
params.sheets = 1;
params.margins = PRN_FINAL_MARGIN;
params.palette = palette;
params.exposure = PRN_EXPO_DARK;
printer_send_command(PRN_CMD_PRINT, (uint8_t *)¶ms, sizeof(struct prn_config));
r = printer_wait(PRN_BUSY_TIMEOUT, PRN_STATUS_BUSY, PRN_STATUS_BUSY);
if ((r & ~(PRN_STATUS_FULL | PRN_STATUS_TIMEOUT)) & PRN_STATUS_MASK_ERRORS) {
r |= PRN_STATUS_AT_BUSY;
goto end;
}
r = printer_wait(PRN_PRINT_TIMEOUT, PRN_STATUS_BUSY, 0);
if ((r & ~PRN_STATUS_FULL) & PRN_STATUS_MASK_ERRORS) {
r |= PRN_STATUS_AT_FINAL;
goto end;
}
end:
#ifdef DEBUG
EMU_printf("%s: 0x%04x\n", __func__, (uint16_t)r);
#endif // DEBUG
return (r & ~PRN_STATUS_FULL);
}
Link to the complete file "gbprinter.c" (alt 1)
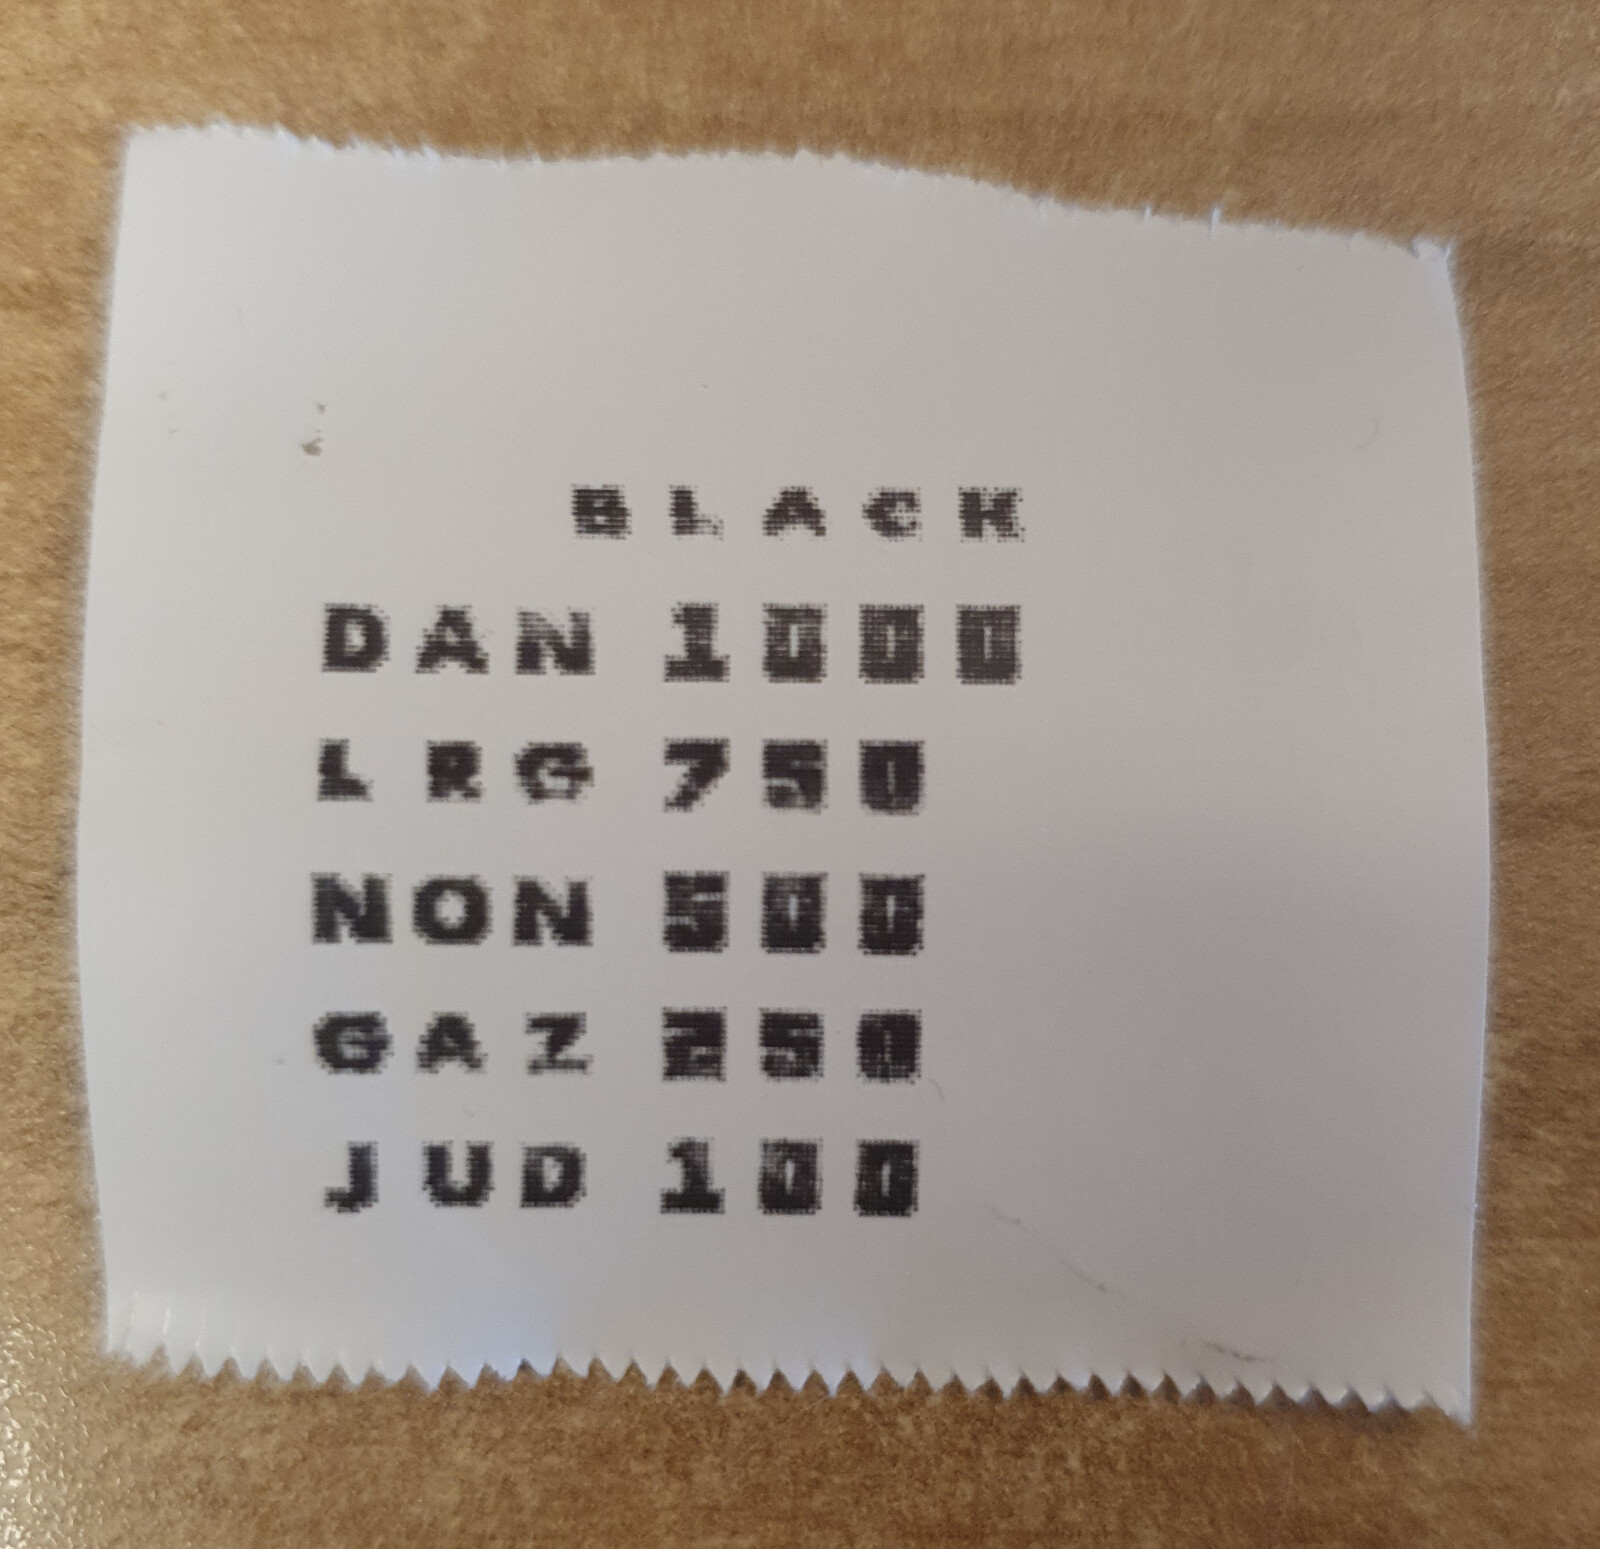
Here is a screencast of printing in the GBE+ emulator and a copy of the results.
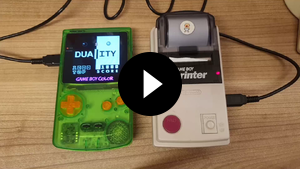
And this is a recording of my actual old childhood GB Printer in action.
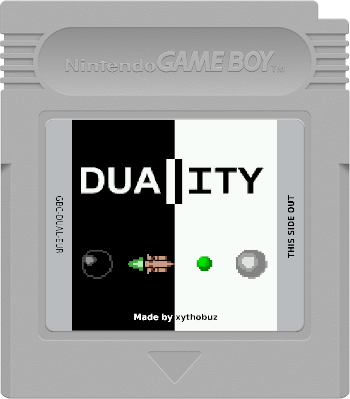
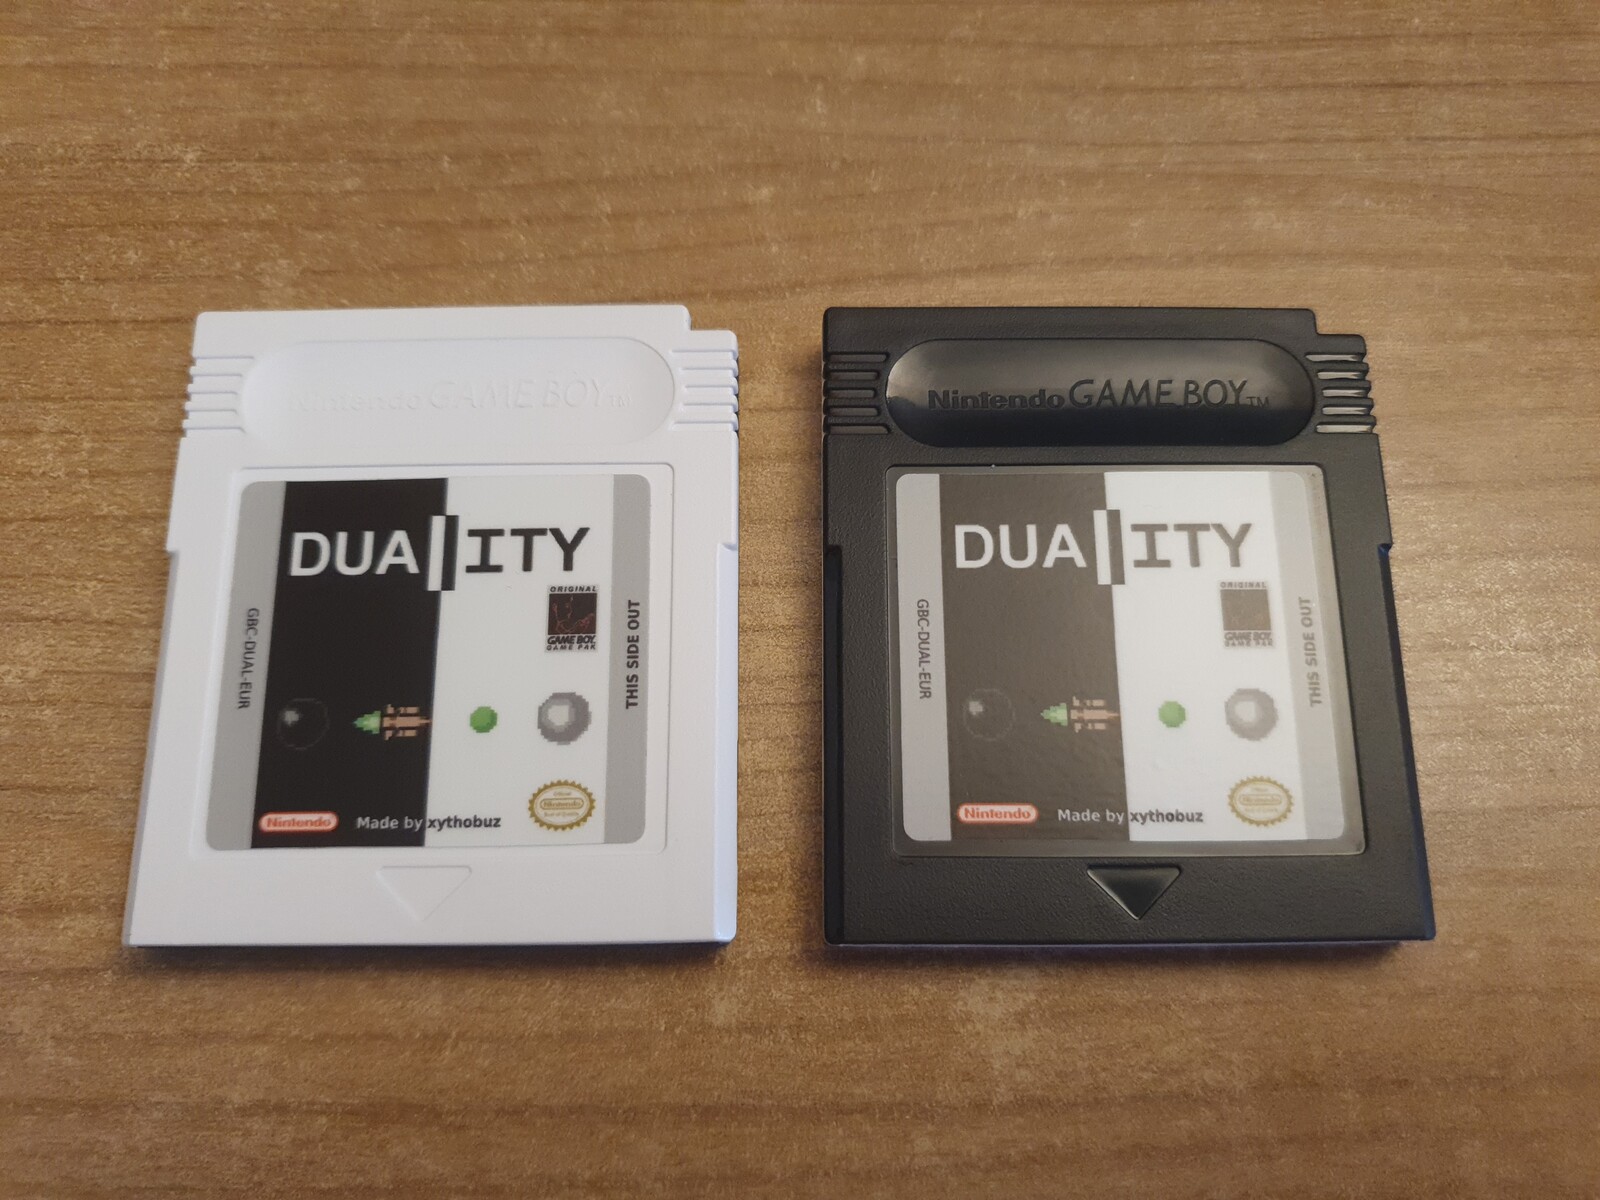
Physical Cartridges
To build physical cartridges I ordered two flashcarts as well as cartridge cases in black and white.
Unfortunately the flash carts use FRAM and a custom CPLD implementation to replace the mapper chip. It seems the timings or voltages or some other electrical or physical parameters are not quite correct. I can't get them to work in the GB Interceptor for example. But in my real DMG and GBC they work fine.
I'm using this clone writer, although I wouldn't really recommend it. It's very slow and can't be updated, probably due to being a chinese clone. Also the "upstream repo" is completely empty. Unfortunately all other writers supported by FlashGBX are not really free hardware or software either.
To write to the carts I'm using the DIY cart with MX29LV640 @ WR setting of FlashGBX.
I ordered three pieces of the label printed on foil, with the rounded corners cut out, at Klebefisch, for 30€ including postage, or about 10€ per label. The parameters were:
- White foil
- Cut outline
- Not mirrored
- 42mm by 37mm
- 1.5mm corner radius
The size and finish of the sticker are great, but unfortunately the print quality is pretty bad with a low resolution (even though I sent high-res files with 2100px x 1850px).
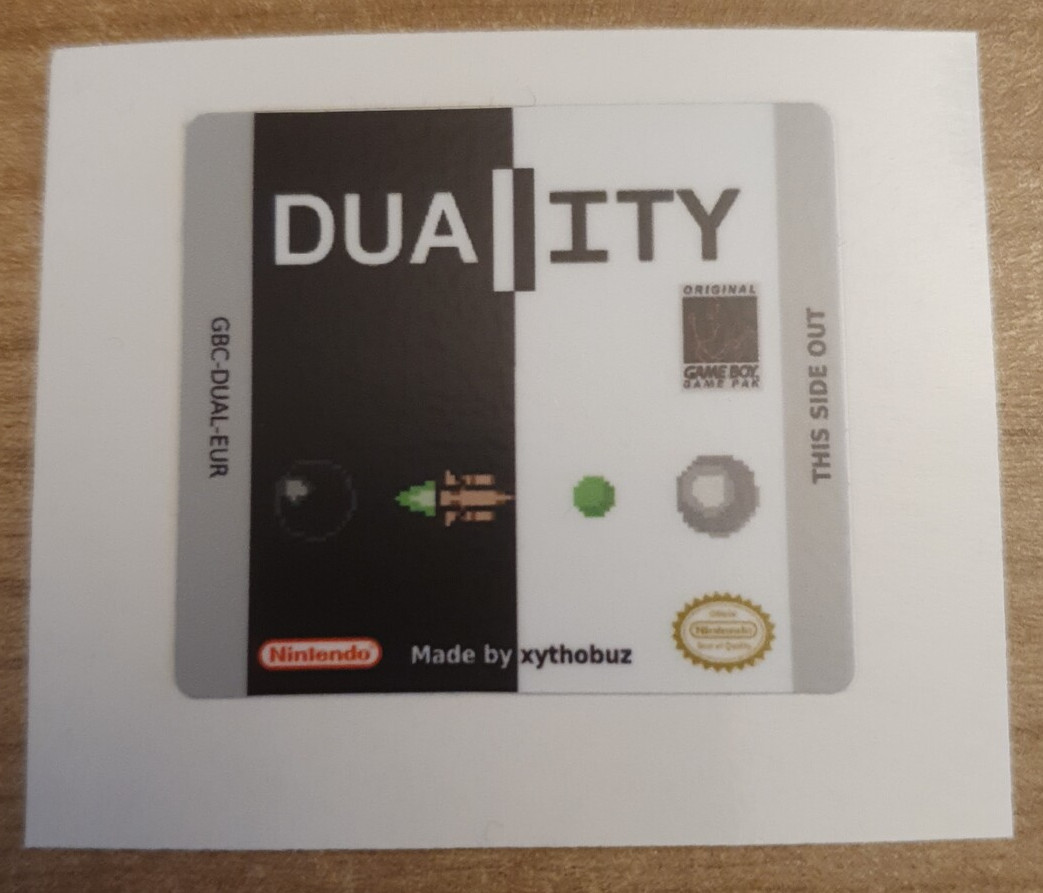
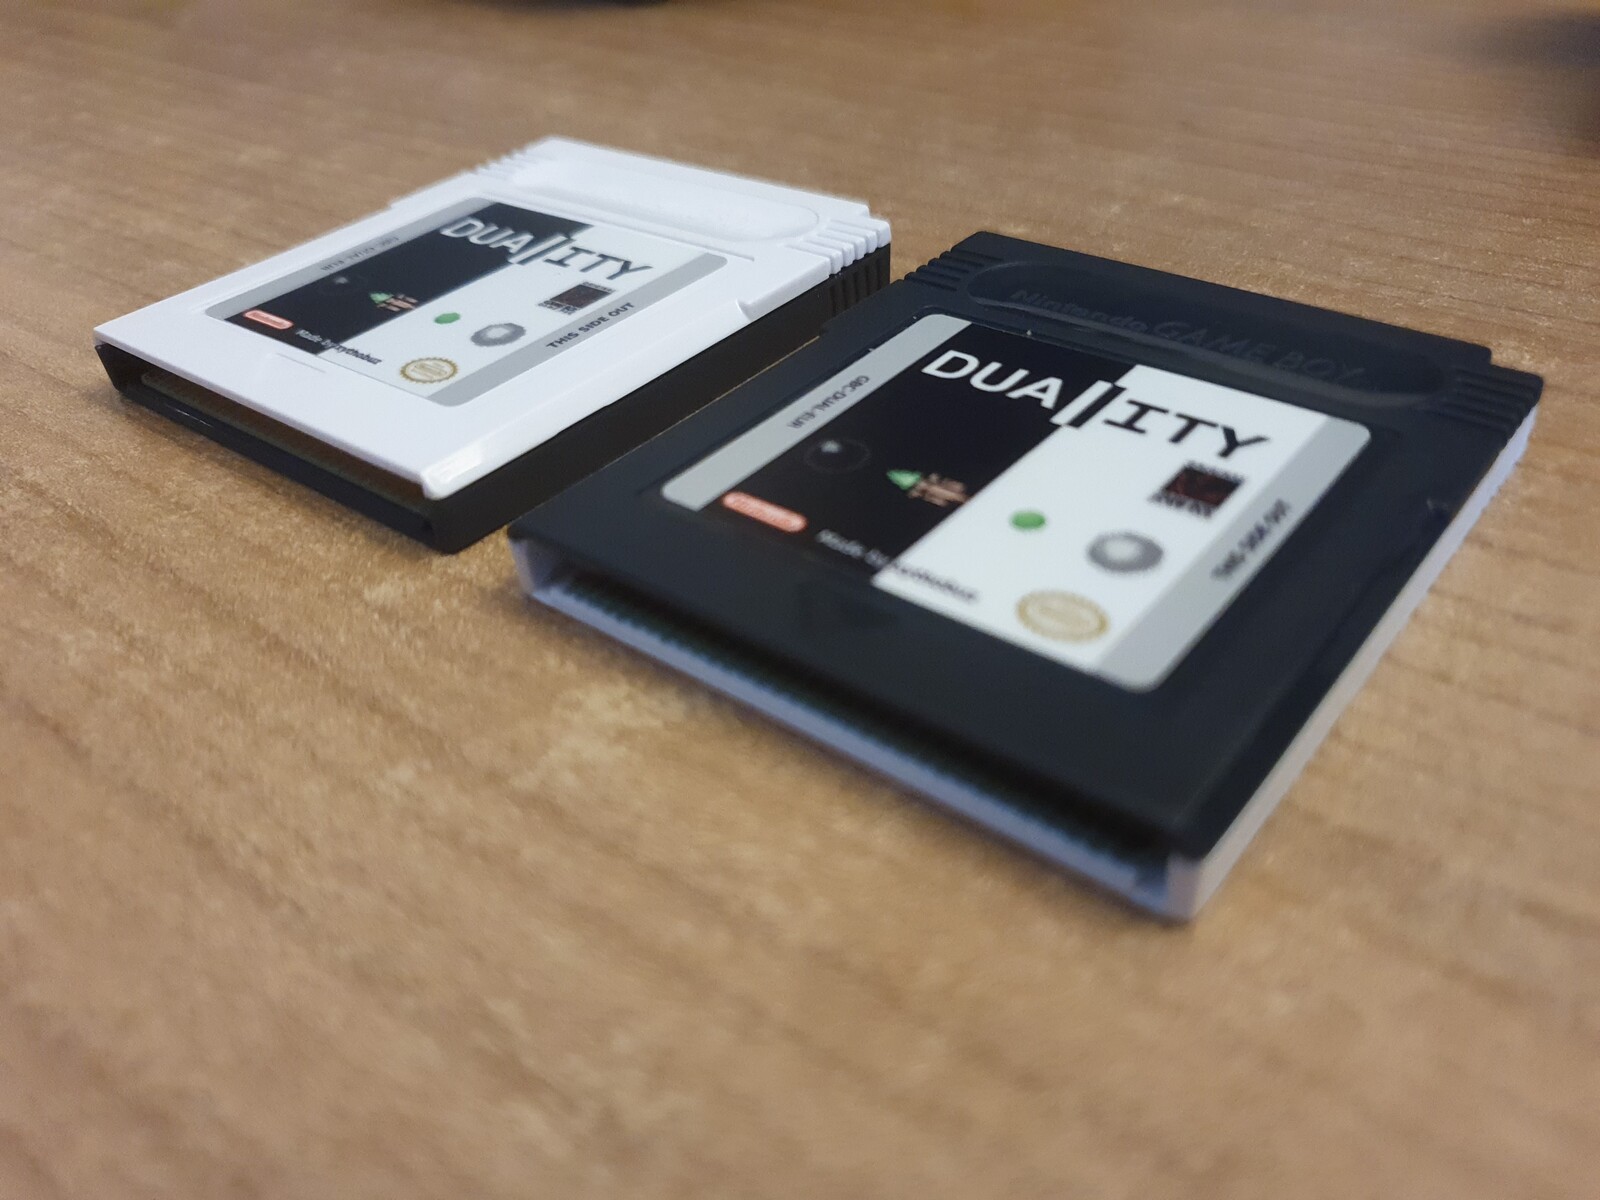
But still the finished cartridges look and feel great! It's nice to have something physical in hand instead of "just" software.
The cost for these came out to around 15€ per piece from AliExpress, excluding the label and working hours. There are other manufacturers of new carts for homebrew games, like insideGadgets, but surprisingly they are not really much cheaper, even for larger production runs.
It's also possible to manufacture your own cartridge PCBs, but there are some caveats with this.
The main problem is the memory bank controller, in my case the most common MBC5 from Nintendo.
They are no longer manufactured and can not be sourced new, so you either have to salvage them from original old donor games (which hurts the archivist in me too much) or find some kind of replacement.
Different people came up with implementations based on CPLDs or microcontrollers. Some of them are even open-source, like the MBC5 CPLD code from insideGadgets or Allison's Bootleg Cart. In a modern design you can use this with an FRAM chip to avoid the need for a backup battery for savegames, although this comes with some timing incompatibilities that may give problems with some games. You can also use a design with an SRAM and a coin cell. Many different flash chips are compatible in theory, though you need to make sure it can handle 5V or add voltage translation circuitry.
Unfortunately, doing some back-of-the-envelope cost calculation, this all comes out as more expensive for small production runs. It's cheaper and faster to just buy the chinese flash carts.
But to be honest, I'm not sure how much interest people would have in buying physical copies of this game anyway, so I shelved this idea for now. Of course you can always easily make your own if you'd like.
Asset Recreation
In order to get some inspiration from the original versions I extracted the relevant assets from the GTA:SA game files, like sprites, backgrounds, sound effects and music. I then re-created these in scaled-down versions that fit the Game Boy hardware.
Extrating the audio files can be done with Alci's SAAT GUI FrontEnd.
The graphics can be extracted from .txd files with the TXD Workshop.
Both of these run fine in Wine.
For the menu music I've re-created the San Andreas Theme, the game-over screen uses the victory fanfare from Final Fantasy VII. Fortunately both of these have spread very widely and there's lots of MIDI interpretations available. I used MuseScore to convert these MIDI files to sheet music and then transcribed the notes into my note lists in the source code.
The Duality in-game theme song was more difficult. It consists more of noises and some LFOs instead of clearly defined notes, so transcribing was pretty hard. In the end I used a trial version of AnthemScore in Wine to get an approximate idea of the notes, but the result is not great.
Here are some direct comparisons. First the San Andreas Theme, used as menu music.


Next the score screen music, which comes from the FF7 victory fanfare.
And the in-game music, from the original Duality.
Summary
I started working on this project at the end of May 2025, and basically finished it (to the state described here) at the end of July 2025, so in a span of about two months. Of course this was only a side-project in my free time, outside my real job that pays the bills. For this relatively short time I'm pretty happy with the results.
As always there is still lots of room for improvements.
The code needs to be optimized so it runs full-speed on the DMG, maybe by improving object handling and rendering, which has some 𝒪(𝓃²) behavior.
I also started working on a multiplayer mode, but due to me only having a single GBC and DMG to test each, I didn't really progress much there.
And the background map scrolling could be improved. I played around with mirroring the map when overflowing on the sides, like some kind of endless scrolling, but haven't gotten far unfortunately.
Working on a well-documented and well-designed retro game system like this was really lots of fun. In the future I hope to also take a closer look at other retro platforms.
License
The Duality source code is licensed under the GNU General Public License v3.
Copyright (C) 2025 Thomas Buck <thomas@xythobuz.de>

This program is free software: you can redistribute it and/or modify
it under the terms of the GNU General Public License as published by
the Free Software Foundation, either version 3 of the License, or
(at your option) any later version.

This program is distributed in the hope that it will be useful,
but WITHOUT ANY WARRANTY; without even the implied warranty of
MERCHANTABILITY or FITNESS FOR A PARTICULAR PURPOSE.  See the
GNU General Public License for more details.

See <http://www.gnu.org/licenses/>.
Duality uses the GBDK-2020 libraries and is based on their example code.
The files sgb_border.c and sgb_border.h are copied directly from their sgb_border example.
The util/cvtsample.py script is based on a GBDK example.
The 8x8 font is public domain.
The included cartridge label graphic in artwork/cart_label.xcf is based on the 'Cartridge-Label-Templates' by Dinierto licensed as CC0.
The included cartridge graphic in artwork/cartridge.xcf is based on the 'Front-End-Assets' by Duimon.

